
So I have this sofa...my mom bought it from Sears in the late 70s. It was in the living room. You know "that" room where only company is allowed to hang out.
Fast forward to 2000. My parents decide to move right before my wedding. New house has a great room - no formal living room. Mom can't bear to part with her beloved sofa and chairs (but she's keeping the tables...). So I happily part with my college dorm futon and wine crate end tables to make room for them in my living room. My living room is 1/2 the size hers was. However, the furniture is small scale. If it were made today, it would be considered apartment size - perfect for my 1945 cottage with mega small rooms.
Did I mention this is THE most comfortable sofa on the planet? BEST couch ever for napping. Seriously. AND it's a sofa bed. One that isn't uncomfortable even. Oh and it looked brand new...classic colors. More or less classic print...which I liked, but no longer went with the updates we started months ago.
Here it is BEFORE

Fast forward 2010. Mr. Paisley's friend moves back to FL from NC. He used to do auto upholstery. He sews like a fiend. I inform him he's going to help me slip cover this sofa because it's not working with my new color scheme. Life gets busy. 6 months later he's moving back to NC - no job, no money. I try to bribe him with cold hard cash to whip up this slip cover before he leaves. No dice.
Fast forward (again) to May 2011. Hey we're having the annual Memorial Day party - dammit, I gotta do something with this couch! Mooooooooooom! I'm insistent on a slip cover. She comes over and she and Mr. Paisley are checking it out before I get home from work. She calls on my cell - "I think we should just re-cover it. It doesn't look that hard." Ummmm. Ok. So I get home and they are already taking it apart...

(hi mom!) - digging out staples holding on the skirt...
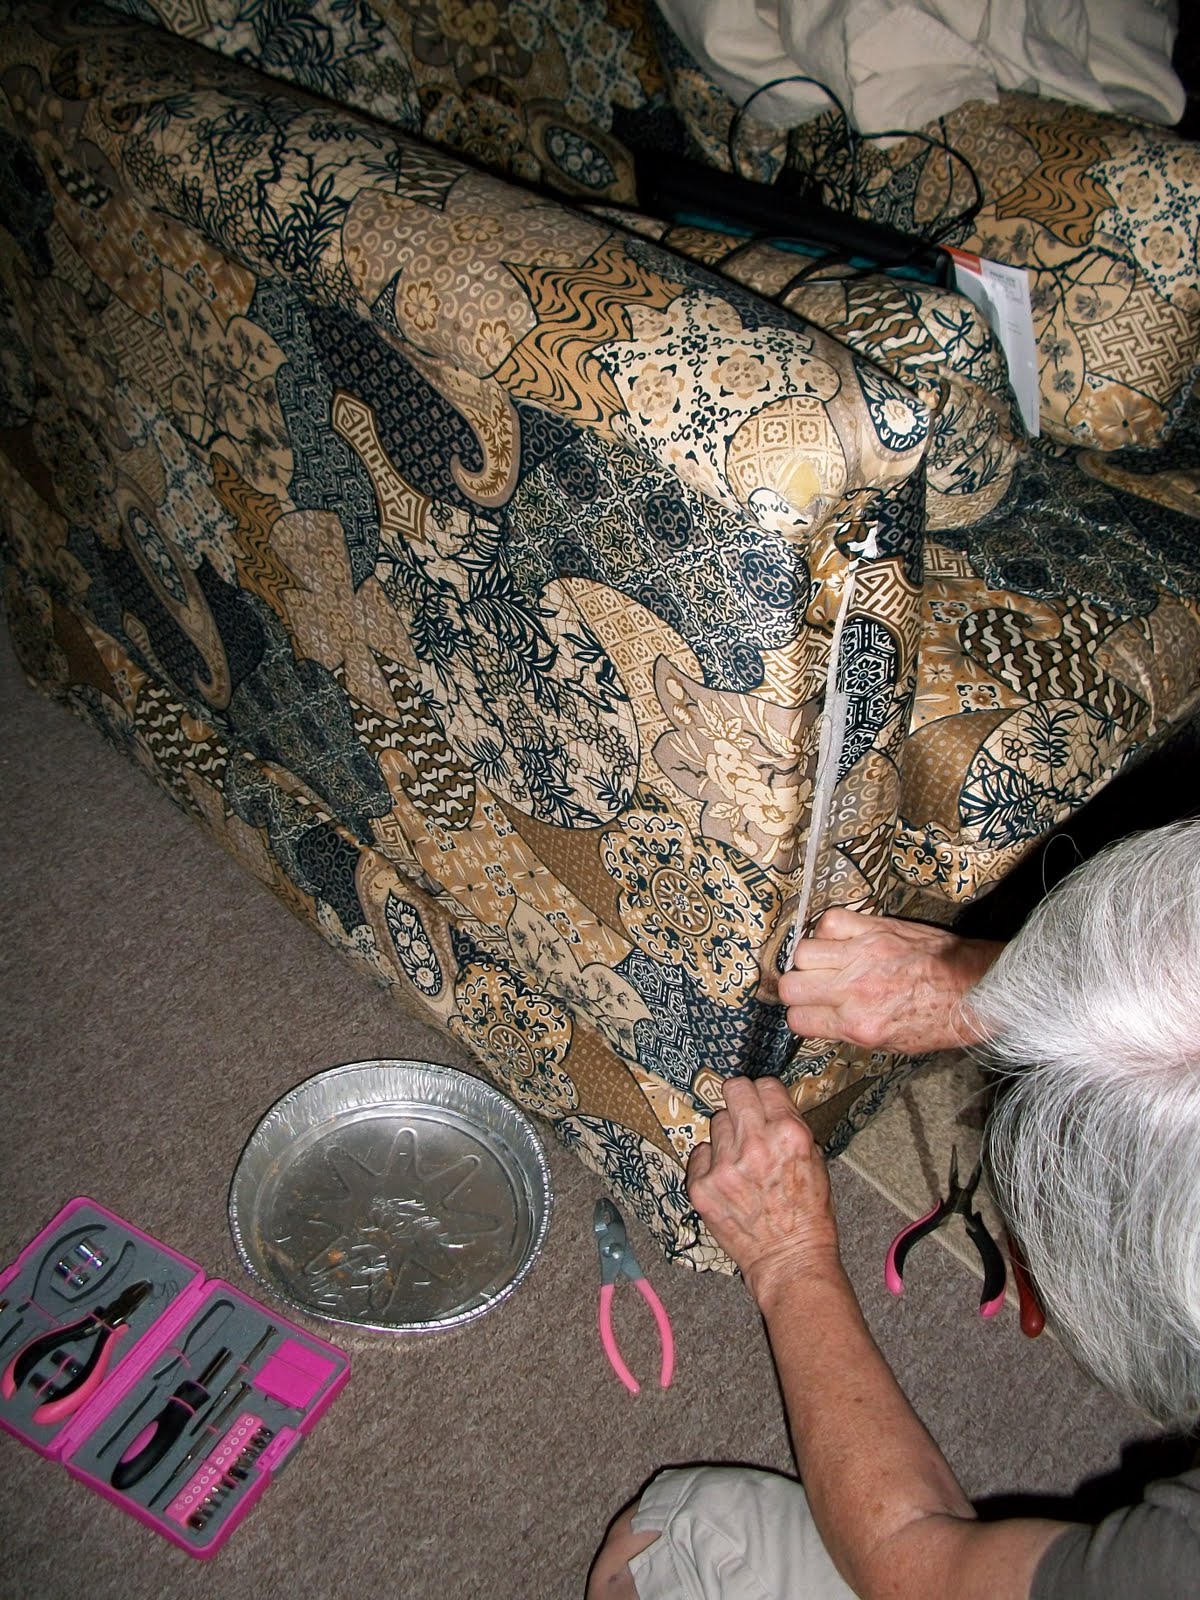
Removing the front panels on the arms (these are just tacked on with 3 nails, they pop right off)

There it is...

Close up that was supposed to show the nail...

More staple removing...flat head screwdriver works awesome for this...once you find the right size.

Slow going...no rhyme or reason as to the orientation of each staple. Some vertical, some horizontal...

Of course one end would pop out and then had to be pulled out with whatever was handy (in this case, Mr. P's side cutters that were laying around)

The tan wavy-ness is the bottom of the sofa bed.

Staple collection is growing...

Yea! Skirt is almost off...on the front *sigh*

SUCCESS! Test fitting the first strip of fabric - you can snip a notch in these canvas drop cloths and just tear them - it rips in a straight line! Quick and easy!

Bad picture, but limited workspace...what's a girl to do? This is the back side of the front "board" across the bottom of the sofa...the sofa bed is kinda tilted up so we could get the staple gun in there.

Trusty scissors and a chunk of foam that fell off somewhere. This is dismantling the outside of the arm. Since we had no clue what we were doing, we didn't want to strip the piece - had to have something to look at while doing it to make sure we could put it back together. As you can see, the fabric comes over the arm from the inside and is stabled to the frame. Then there's a fabric panel just stapled over that, wrapping around the front of the arm. It's hard to see because of the print but there's a lovely crisp edge at the back and top. Compliments of a strip of thin cardboard (see blue arrow). We laid the fabric over the arm from the inside, stapled on the cardboard (level of course) and flipped the fabric right side over to cover the outside of the arm and voila - nice crisp, straight, edge. Cut your fabric long enough to wrap around the back corner a little. Staple. A lot.

Obviously, we did the inside of the arm first (who does a tutorial in order?) Oh yeah, did I mention we didn't even pull off the old upholstery? Nope...just pulled it apart enough to figure out how it was put on! Since this is a sofa bed, it's like wrapping a gift to some degree. The inner arm fabric is stapled on on the outside under the "rolled" part where the frame for the arm is. Smooth it down the inside of the arm, pull it tight at the bottom and staple it to the inside of "the box" (where the bed goes into it) - make sure you have enough to go to the bottom of the box because you need the length on the front to cover the cording and foam in the above photo. We had to cut the fabric to straddle the board across the front. Covering the foam and the cording was also a little tricky. Mostly because you get a big wad of stuff that you have to staple thru and you can't tell where the wood frame is AND keep it pulled tight AND staple all at the same time. This step caused many staples to die in vain. RIP little soldiers...
anywho - we stapled the fabric on along one edge, topped it with the cord and foam kind of rolling and tucking as we went, then attempted to staple it underneath itself - if that makes any sense. That way the stapled don't show.

Dark picture, but look at that nice creamy front board! Woo hoo! That was all we got done the first night.

Here's the inside of the arm. The fabric that goes into the back corner...is just stuffed in there. No staples. They didn't use them when they built it, I didn't see any point in adding them now.

This is a picture my mom took while trying to figure out how to use my camera...it's of nothing important.

Again...she's still trying to figure out the camera.

Success! Mom figured out the camera! Gift wrap remember? Here's where we tucked and wrapped and stapled the inside and outside arm pieces to cover the front of the arm. Make sure you have enough - even though it will be covered by the little face plate. Remember how you did the folds...you want the other arm to match when you get to it.

Perforated foam. Not really sure what it's purpose was. It went in the trash.

Working that side panel...

Voila! One finished arm!

Back corner....the back is done the same way as the outside of the arms. The inside of the back (behind the cushions) goes over the back and is stapled along the back of the frame. A very long piece is the stapled across the back and down the corners and across the bottom. With cardboard and a nail strip to make pretty edges. Be sure to pull it tight. What? Nail strip? Yeah, no picture of that. It's a thin metal strip with nails attached. It works kinda like the cardboard to make the straight edge along the vertical corner. You put it behind the fabric with the nails facing the frame, the wrap the edge of the fabric over it, popping the nails thru. Then you hope, pray and swear some while trying to keep the fabric from coming off the nails while you attempt to pull tight down and across to the bottom corner AND hammer the nail strip to the frame...straight. Lucky for me, my sofa is against a wall.

Here's where we stapled the side panel to the back.

This is the "face plate" off the front of the arm. It's a very thin piece of wood, covered with a little batting, with fabric stapled over it, with welting stapled over that around the edge.

Here's the back side. It has 3 nails. Both ends and the middle.

Since it was really thin, I used my office stapler to staple on the fabric. This involved a lot of swearing and wasted staples. My staple gun staples were too long and would go thru. This really could be glued I think. Although a professional upholsterer would probably have a heart attack...

Closer upper

Reduce, recycle, reuse! Yup...just covered the old welting with a strip from the drop cloth - I'm told there is a cording foot that makes doing welting pretty easy because it actually straddles the cording (you buy the foot to match the size of your cording). I couldn't find one though. Joann ETC didn't have one. Just a zipper foot - which we both have. So that's what we used. Not as tight as it could be, but good enough.

With the four layers of fabric on the cording, I could use the staple gun to attach the welting. Thank GOD because it was super fast compared to my blue Swingline...

Voila! Purdy....it sat like this for a few days.
Please note - neither of us has ever reupholstered and we have 2 weeks to get this done...we also have full time jobs. I work, mom runs "angel baby daycare" (aka, she keeps the grandbaby during the day).

So mom takes home the cushions to work on while the baby is napping (ha ha ha) these photos show her doing the corner pleats for the cushions. They weren't box cushions - so there wasn't really THAT much sewing to be done - woo hoo!


Voila! Pretty corner!

Mom hates to do zippers. I don't know how to do zippers. Upon closer examination of the original cushion covers....

Zippers it was.

Sew on the zipper BEFORE you assemble the cover with the welting (piping, cording, whatever) and it's easy peasy!


Zipper complete!

Time to add the welting.

10' of cording is $3.99 at Joann's - it comes in a plastic baggie with a cardboard topper. I used a 40% off coupon. You can also buy it by the yard from the big white box. It's $.39 a yard at my store. For the extra $.09 I wasn't willing to wait in the line at the cutting table. I needed 10 yards for the cushions. No brainer!

Satan's little helper! I mean, my mom's lap dog Tia...who was feeling neglected big time so she came to help.


Or chew on the fabric with her partner in crime. Sasha. Note the tongue...

Bobo makes an appearance...please play with me. I'm cute...annoying, but cute!


Never mind. Sasha will play with me. Or take my toy and run away with it.


Right...zippers and corners.

Measure and sew across the corner to make it flat.

Pull out the corner you just stitched....

Cut off the useless triangle flap - you could probably leave this, but it might cause the corners to pull a little.

Now Tia is covered in strings and thread...


And mom is still having issues with the camera.

Stuck...

Skirt for the sofa...the skirt has inverted pleats...FAKE inverted pleats.

This is one of the "flaps" used to make a fake inverted pleat.

Nothing fancy...hem a square on 3 sides.

This is the stabilizing fabric that backs the long 'flaps' that make the skirt. It's like those adorable pennant strings that are popular right now - it's a series of short and long flaps sewn onto welting in a huge rectangle that make up this skirt.

Still recycling here - removed the original fabric for this part - the long flaps fold over to the back around all 4 sides to get sewn to the backing material.

Leave a little gap between the rectangles, center a square flap over the gap and sew it all together across the top with welting.


Voila - fake inverted pleat.

Then comes putting the skirt back on. Minor freak out - it didn't fit. Actually it did, but we had to set the sofa into it, rather than pull it over the top. Which sucked because it's a sofa bed. It weighs more than my 1965 Mustang i'm certain. This is really a 2 person job - one to hold it and line it up and one to staple...unless of course you flip the sofa upside down (again, it's a sofa bed) and just work with it upside down which would be SUPER easy if it weren't for the turning the sofa over part. I used a combo of vertical and horizontal staple to get it nice and tight where it butts up to the cording and foam at the bottom of the front of the arms.

Along the front, I just stapled it quickly because my party guests were starting to show up (nothing like waiting until the last minute) I will pull these and finish it correctly (or what I think is correct LOL) tighter to the cording, more staples...not that there is any stress on this part of the sofa, but Miss Georgia Grace will be mobile before we know it and who knows what she will tug on, pull up on, etc.

This sofa has a single seat cushion and three back cushions. The original seat cover had uneven button tufting. We were going to do this, but realized it wasn't even on the original - which we never noticed because of the patterned fabric. It's VERY forgiving. The off white, linen knock-off (drop cloth), not so much. You see everything. We had to commandeer my drop cloth curtains to finish the cushions - they had seams down the middle. LIGHT BULB - forget the buttons, let's put seams across the seat to line up with the back pillows to hint at 3 separate seat cushions. I liked the seam on my curtains. I like it just as much on my cushions. I'm showing a picture both with and without the flash because it's not that noticeable.


Here are the pretty finished corners of the pillows.

And here is the finished sofa - LOVE IT
I guess I never took a picture of me hammering the face plates back on the arms. I just used a hammer and a scrap of fabric over the face plate just to make sure I didn't leave any marks. Make sure they're even and cover all the uglies of your arm stapling. You might have to do some last minute adjustments to make that happen. I did.

The couch is SO SUPER SOFT! I washed each drop cloth by itself in hot water (full load even for the smaller ones) with a Purex 3-in-1 cloth (?), 1C of white vinegar and a Downy Ball full of liquid softener - then dried them in the dryer with dryer balls AND a couple of dryer sheets. Might have been overkill, but they sure do stink right out of the package and they're crunchy stiff! Not anymore!
Aside from "a small fortune" i'm not sure what the going rate is for reupholstering a sofa. My mom and I (and Mr. P) did it in a couple hours a day over a 2 week period for about $70. 4 canvas drop cloths, 2 spools of upholstery thread, 2 packs of machine needles, 10' of welting, 6 zippers and a box of staples. I even used coupons on all of except the staples (had some of those $10 off $50 from Lowe's plus 40% off for all the stuff at Joann's).
On a side note, I sent Mr. Paisley to Lowe's to buy replacement "drapes" and the new ones don't have seams :-( and they're not as light in color...and after 2 washings with all the extras (as above) still not nearly as soft. BOOOO!
Next upholstery project...the wing chair in mom's bedroom! But not this week...
Link Parties!


